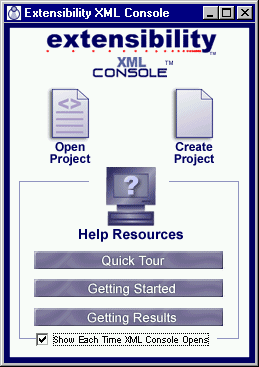

The Welcome window appears when you run XML Console (See Figure A).

Figure A - Welcome window
To open an existing project file, click on the Open Project icon. The Open XML Console File dialog box will appear. Select a file from those listed, or type a file name in the text box, and then click the Open button. The program will initialize with the project file loaded. Any schemas, instance documents, and directories stored in the project file will be listed in the main window.
To choose from a list of recently open projects, right-click on the Open Project icon.
To create a new project, click on the Create Project icon. XML Console will intialize with the main window displaying an <Untitled> Project folder.
To add a schema or instance document to the project, click the Add File button on the Project Management toolbar, or choose Add File ... from the Edit menu. The Add file to project dialog box appears with a list of files in the current directory (or the dialog box may display one or more folder icons). Select a file from those listed for the current directory, type a filename in the text box, or browse to find a file in a target directory. After you have selected a file to add to the project, click the Open button.
To add a directory to the project, click the Add Directory button on the Project Management toolbar, or choose Add Directory... from the Edit menu. The Add directory to project dialog box appears with a folder icon. At this point, you can either
After you have selected a directory to add to the project, click the Open button.
In the Welcome window, clicking the Help Resources icon (with the question mark) will bring up the XML Console Help window with a list of topics. Below the Help Resources icon, a menu offers three additional options:
Copyright 2000 Extensibility, Inc.
Suite 250, 200 Franklin Street, Chapel Hill, North Carolina 27516